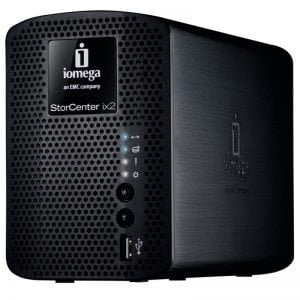
Upgrading Iomega ix2-200 to Cloud Edition

Katılım
12 Haziran 2011
Mesajlar
14.298
Makaleler
3
Çözümler
6
Yer
Nebuchadnezzar
Daha fazla  
Meslek
Judge Dredd
You just got your ix2-200 from eBay and there are no disks inside the NAS. Or you have a brand new ix2-200 -yet you could not afford Cloud Edition. No problem. With just a USB stick and a SATA adapter or desktop PC, you will easily upgrade your ix2-200 to ix2-200 Cloud Edition.


Not only your ix2-200 will have a brand new interface and Cloud options, but also will become Mac OS X Lion compatible!


What do we need?


  • Decrypted! ix2-200 Cloud Edition Firmware 3.1.12.47838 SendSpace or RapidShare*
  • USB Flash Drive with at least 2 GB capacity and LED indicator**
  • SATA to USB adapter or desktop PC
  • Toothpick or paperclip

Preparing Hard Drives

Preparing hard drives is the first step because you have to wipe all the data inside the hard drives and make them just like brand new. We used 2 x Seagate 2 TB 5900 RPM Drives.

  1. Backup any files if you have and then remove both disks from ix2-200 and attach them to SATA to USB adapter or your desktop PC's SATA port.
  2. Using Easeus Partition Master Home Edition, delete all partitions on the drive. Apply this process to both disks. Don't forget to click on Apply button after you delete partitions on Easus Partition Master HE.
  3. Now put the disks back into the ix2-200.

Preparing USB Flash Drive


  1. First of all, format your USB drive with FAT32 file system. We used Quck Format and drive defaults.
  2. Then create a folder named “emctools” and create another folder inside that one named “ix2-200d_images”. It should be like this: X:\emctools\ix2-200d_images (For some, the folder name needs to be “ix2-200_images”.)
  3. Now copy the ix2-200 Cloud Edition Firmware (ix2-boot.tgz) you have downloaded into “ix2-200d_images” folder.

The Upgrade [Update: You have to do this process twice! We had to!]


  1. Plug the USB stick you have prepared into ix2-200.
  2. Get yourself a paperclip or better, a toothpick. Make sure that you are properly pressing the reset button and you won’t get tired easily.
  3. Now while holding the reset button, plug in the power cord. White LED in front will start to blink. After about 30 seconds both disks will start spinning, keep pressing the reset button. After 1 minute, USB’s LED will turn on but it won't blink.
  4. Wait until USB sicks LED continously blinks. When it starts blinking, stop pressing the reset button. In our case, this happened about 70 seconds after we we plugged in the power cord.

In this process, ix2-200 will crate a Temp folder inside the USB stick and extract the contents of ix2-boot.tgz into that folder. When all files are extracted, ix2-200 will copy those files into the hard drive and those files will be your Cloud Edition OS.

After about 5 minutes when this process is done, ix2-200 will shut itself down. Remove the USB Flash Drive, plug in the network cable and press the power button in front of the device. Again after about 5 minutes, ix2-200 will preapere the OS for the first time and you will be able to reach it via web interface.

If you can't reach the device's web interface, wait for 10 minutes. After that, plug out the power cord. Now put the USB stick back into your PC and go into emctools\ix2-200d_images folder. You will see a Temp folder there. Delete it and then apply The Upgrade process again. This time, device will properly reconstruct the OS.

If you want RAID 1, you will have to wait for RAID reconstruction to finish which will tkae more than 5 hours with 2 x 2TB disks installed.

But if you want RAID 0, you can cancel the resconstruction process by simply selecting RAID 0 and then applying that from the menu.

This is it, now you have a fully functional ix2-200 Cloud Edition.


*Special thanks to netboy69 for providing the decrypted firmware.

**A different USB Stick may be required in some cases. Looks like USB sticks are creating a lot of trouble. Try with another one if process fail as in this case, the 3rd USB stick worked...

Reported List of Succesfull USB Drives (Does not mean that you have to use those):

Lexar JumpDrive TwistTurn 8 GB (LJDTT8GB)
Kingston DataTraveler 2GB
Sandisk 8GB Cruzer Slice
Verbatim Store&Go 4GB

If the above method did not work for you, here is another guide from our members.


Bu orijinal bir Technopat rehberidir Türkçe sürümü için tıklayın...
Iomega-ix2-200-300x300.jpg
 
First off, thanks for posting this! With the floods in Thailand, some retailers and vars here in the US were buying ix2-200 4TB models just for the drives - they were cheaper than buying the raw drives for a while, so they just removed the drives and have the chassis for sale cheap. So, now there's a glut of ix2-200's out there with no drives. I found one site (Chantilly Store - Search) that's currently offering them for $20 USD (I'm not sure if they will ship internationally).

I bought 2, and followed your directions. Your directions were very good!

I used a 4GB Sandisk Cruizer USB 2.0 memory stick, and it worked perfectly. I didn't download the partitioning software - I just tried disk administrator in win7, and deleted the partitions on my drives, and it worked flawlessly. The firmware load didn't even need to be done twice!

Thinking on this, it may have worked the first time because the drives had MBR disk labels, but no partitions - perhaps it needs a reboot to put the disk label on?

On another note, the current firmware level as of 12/30/11 is 3.1.14.995, not 3.2.3. Your link to it here: https://www.technopat.net/forum/ssd...-cloud-edition-firmware-version-3-1-14-a.html was also very useful.

Thanks again - you made getting these running really easy!

Regards,
Vin
 
Hi guys,

I have a problem with my ix2-200...

In the webinterface, Some menus does not have all icons..for e.x. copyjobs>add a copy job>from device>> and them i only have one icone of refresh and do not have any OK or CANCEL.

i need to close the window to get out.

it happens in other menus.

thanks for any help
 
Guys,

The update for cloud version worked fine, but the RAID volume didn´t mount. When I tried to change RAID configuration to RAID0, or any other option, it was saying the pool needed a name.
I´ve made the update proccess 5 times, always the same result.
Then I tried to update to firmware ix2-200-3.2.3.9273 , and everything looked to be running nice, but after the unit restarted, the white led was blinking, and I had no access to web interface.
I tought it was remounting the RAID, so I let it running for more then 12 hours. After that, I´ve noticed something was wrong.
Since then, I can update the unit anymore, with any firmware.
I´ve tried:
1) removing 1st and 2nd disk (alternated)
2) clearing the disks
3) changing for new disks
4) I ran DriveFWUpdater-1.8.exe from iomega

When doing the reset as described, the unit restarts, the disks speens, and the USB led blinks twice, but then, nothing else, except the White Led of DEATH.....

Does anyone have an Idea what may I do?

Thanks to all,

Caco
 

Yeni konular

Geri
Yukarı